How I made my first sockpaws.
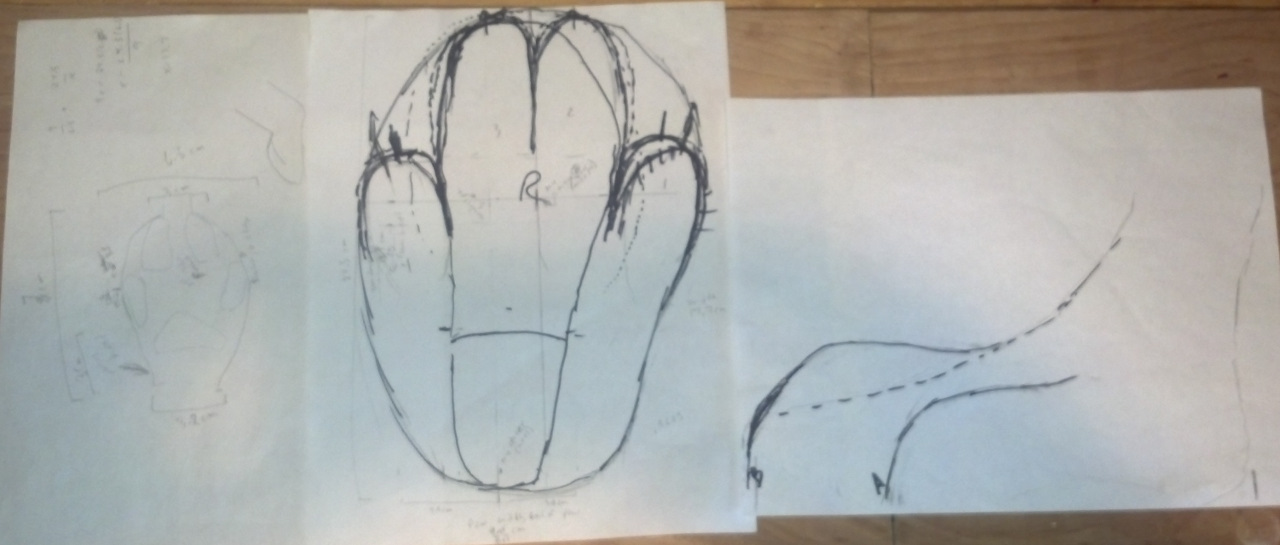
My first step was design. I wanted them to give an appearance of digitigrade or near-digitigrade, so I took an outline of the bottom of my foot and based on its length and width as well as the length and width of the bottom of a fox paw in a photo, and worked out a scaling factor that would transform the shape of the fox paw in the photo to a size that wrapped my foot completely:
Now I had a basic design. I knew how to proceed with shaping and furring, but I wasn’t sure about the claws. I had previously messed around with paws for some feety pajamas and some slippers with claws. For the pajamas, I made the claws from Sculpy, which I sealed and then painted. I tried steel rod ground to claw-shape for the slippers. Neither was ideal, so then I decided to cast them in resin. I’d never done that before, so I had to learn how. Here is what I did:
First I needed to make molds. I chose to use silicone. I formed two from Sculpy, baked them, and sealed them with a clear sealer. Then I sprayed them with a mold release. I mounted these to a piece of hobby foam (Foamies) with hot glue so they were standing up. I used an old, plastic, rectangular tube that had once carried some toy figures in it to make a mold box and glued this to the foam in place around the claw forms. Here is what the set up looked like before I poured the silicone:
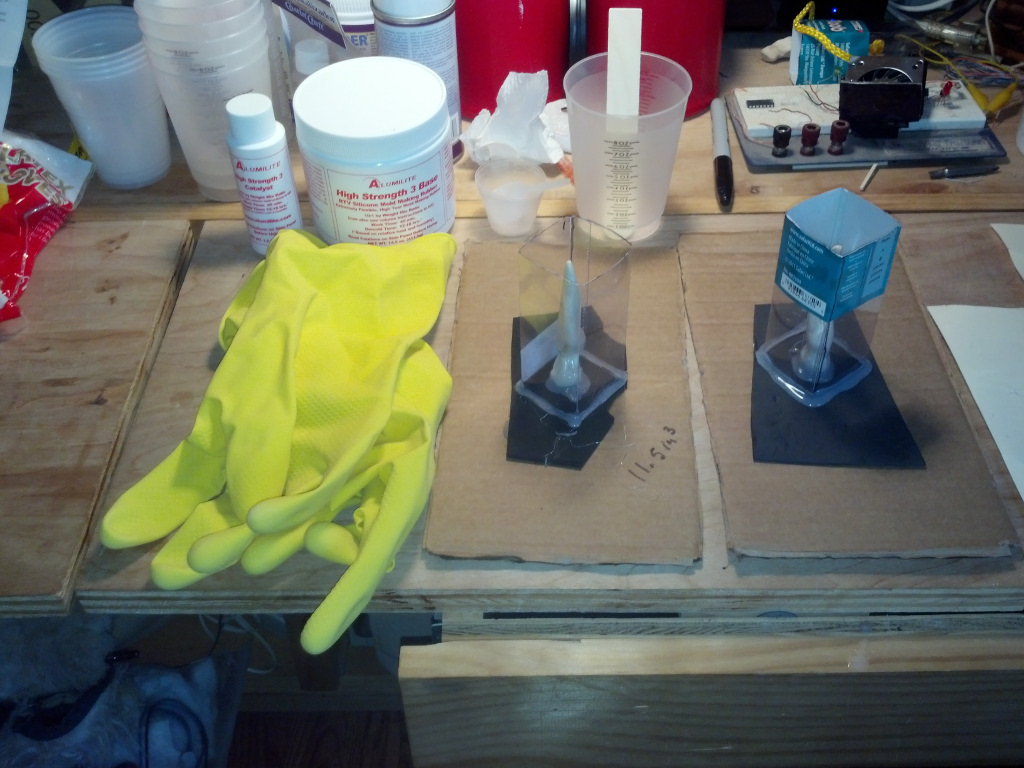
I mixed and poured the silicone until it filled the box about 1/4″ above the top of the claw form. After the silicone had set, I cut away the plastic mold box, slit the silicone in a zig-zag pattern (the zig-zags act as a key so that when you settle the mold back together for pouring everything lines up), and pulled out the Sculpy forms.
I then did a test pour. I settled the mold back together and wrapped a rubber band around it to keep it in place. I mixed clear resin according to directions and filled each mold. After the resin had cured, I removed the rubber bands, pried the mold apart along the seam, and pulled out the claws. Here are the first two claws from the test pour. They are sitting on top of their molds:

These were exactly what I wanted, so over the next week or two I experimented with pigments in the resin, various amounts of catalyst, and a few other things (including embedding LEDs, just for fun. I was not planning on lit claws for these paws). I finally made eight claws, four of each mold. I designed each paw to have 4 claws.
Having worked out the claws, I dove into the paws themselves. I wanted these tall because they are for a partial suit: I intended to wear them with slacks, a tail, glove paws on the hand, and a fursuit head (I actually made them to allow me to use my Ash Fox as White Cape costume as a generic fox. Ash has tube socks over his paws when he’s dressed up as White Cape, so didn’t have to make paws for that costume.). So I used an over-the-calf tube sock for the base.
But I had a problem: there was no way I’d be able to construct these on my own leg, and I needed something to keep the sock stretched while I built the paws. So, I made forms of my legs using duct tape. First I took some plastic wrap (I used some plastic we had lying around, but I think some people use Saran wrap) and wrapped one leg up the knee with it. Then I covered it completely with duct tape. After that, I cut the tape down the side to my ankle bone and slipped my foot out. Then I patched up the seam I’d cut in the duct tape with more tape. I stuffed the entire form tightly with newspaper to make it rigid. I considered pouring a plaster cast of it, but was too lazy. Anyway, after I finished both leg forms, here’s what I had:
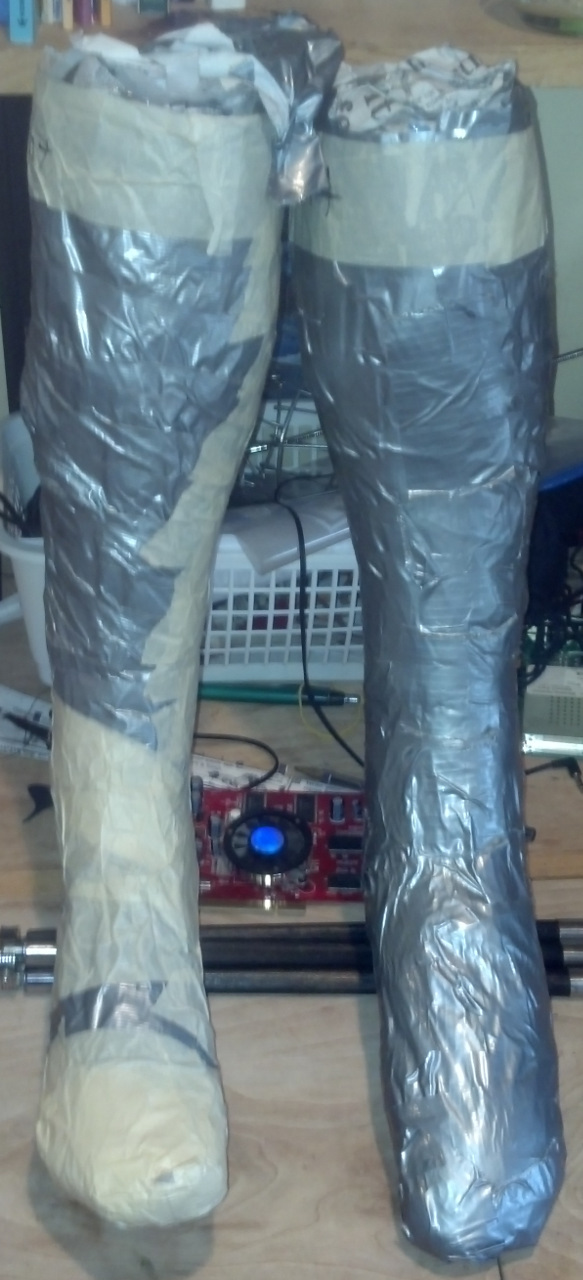
Just check out them gams!
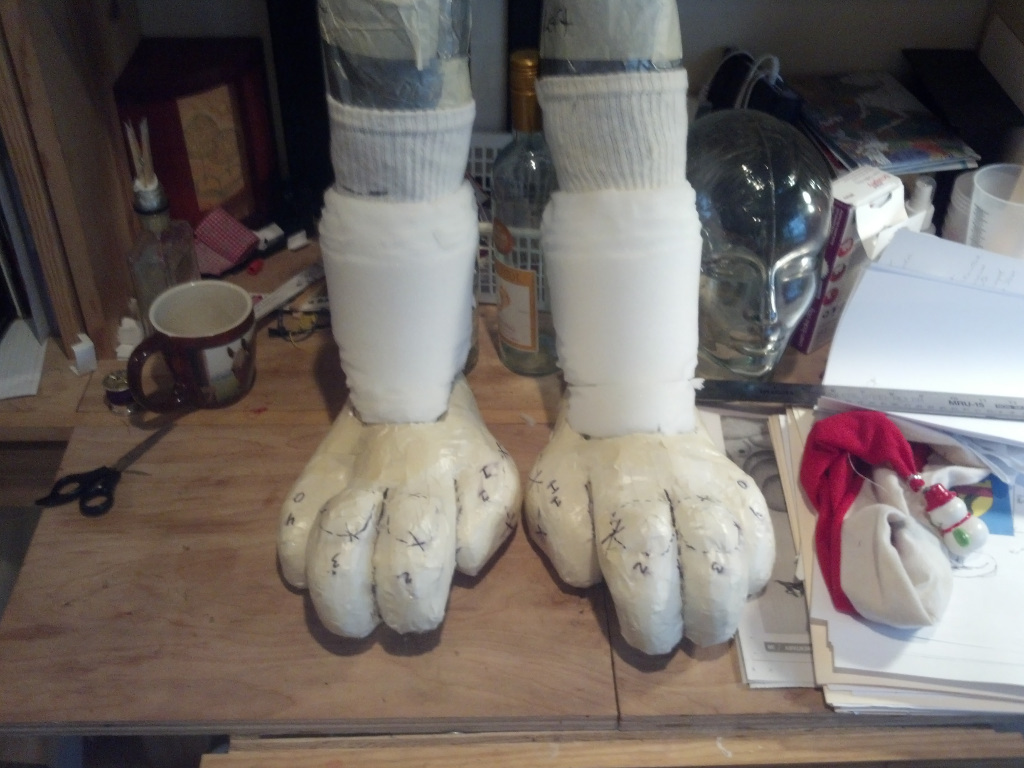
I used the sketches I’d made to guide cutting chunks of poly foam to the 3-D shape of each toe as well as filler chunks here and there and glued them to the tube sock to form up the paws.
One potential problem that concerned me and turned out to be a real problem was how to get my foot in and out past the narrow ankle area once I had the inflexible fur on. I considered several options, including a zipper or buttons on the back, and sewing elastic in place of a small pieces of the fur, but in the end opted for making use of the compressible characteristics of poly foam. I wrapped the lower portion of the calf in a 1/2″ thickness of poly foam. That creates enough compressible space to force my heel through the narrow part of the ankle. Once I had them all foamed up, I covered them in masking tape. They looked like this:
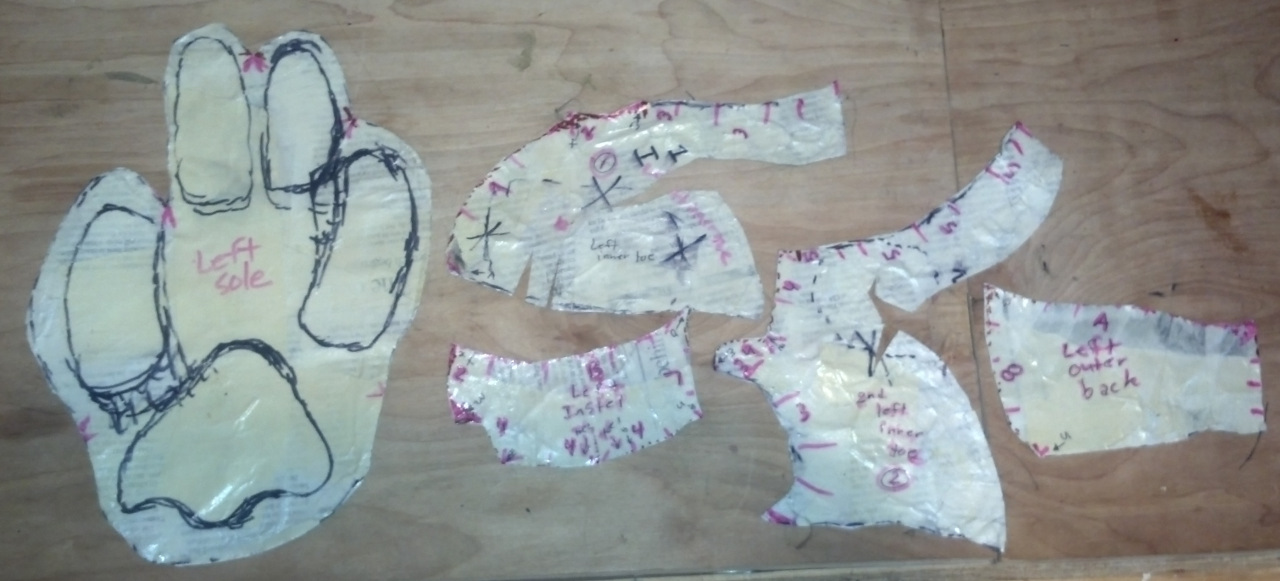
This picture was actually taken right after I had cut away the top segment of tape and illustrates the next step. Yes, it was over Christmas. I marked the tape at places I’d be happy with seams in the fur and then cut the tape loose with an Xacto knife. I cut slits in the pieces I removed so they’d lay flat and stuck them to newspaper. I then cut the paper around them to make a set of patterns for the pieces of fur. Here’s a sample of a few:
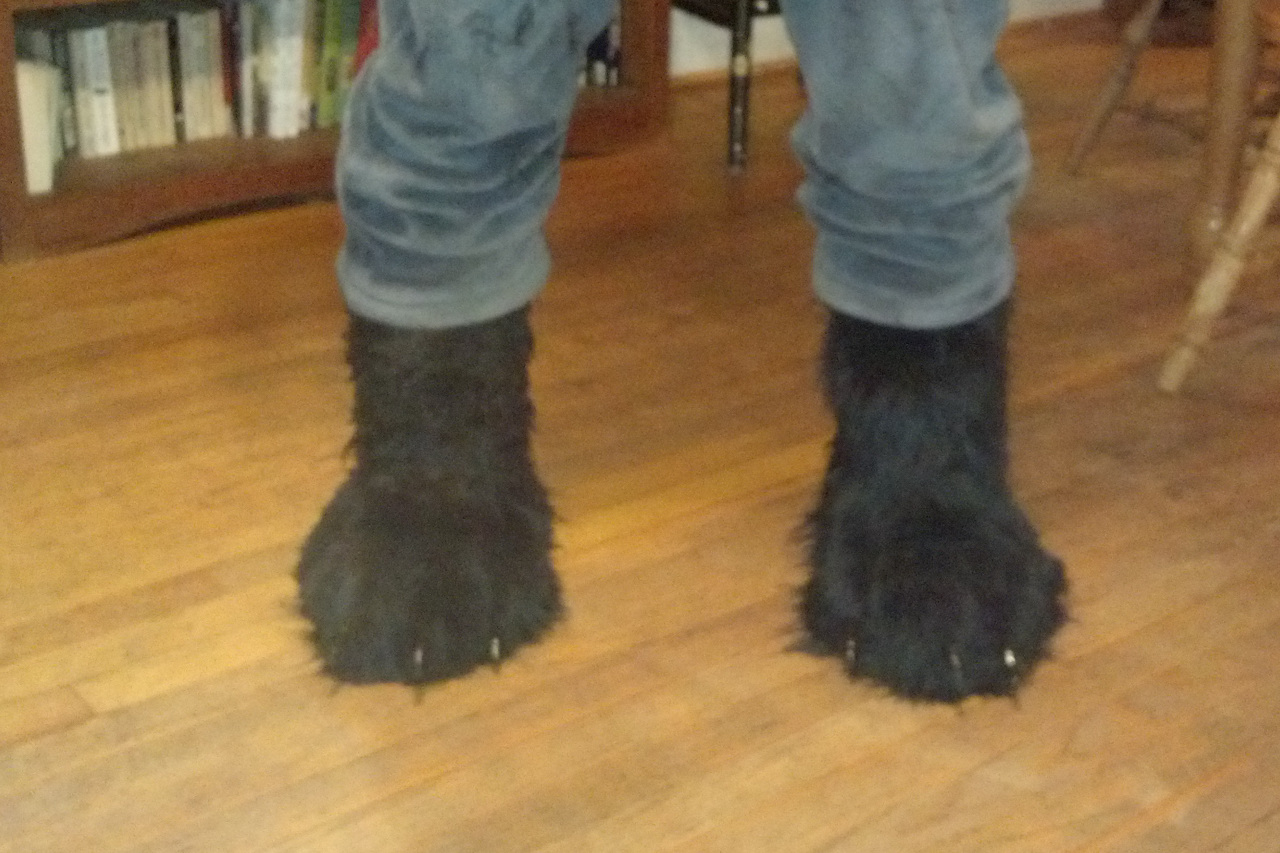
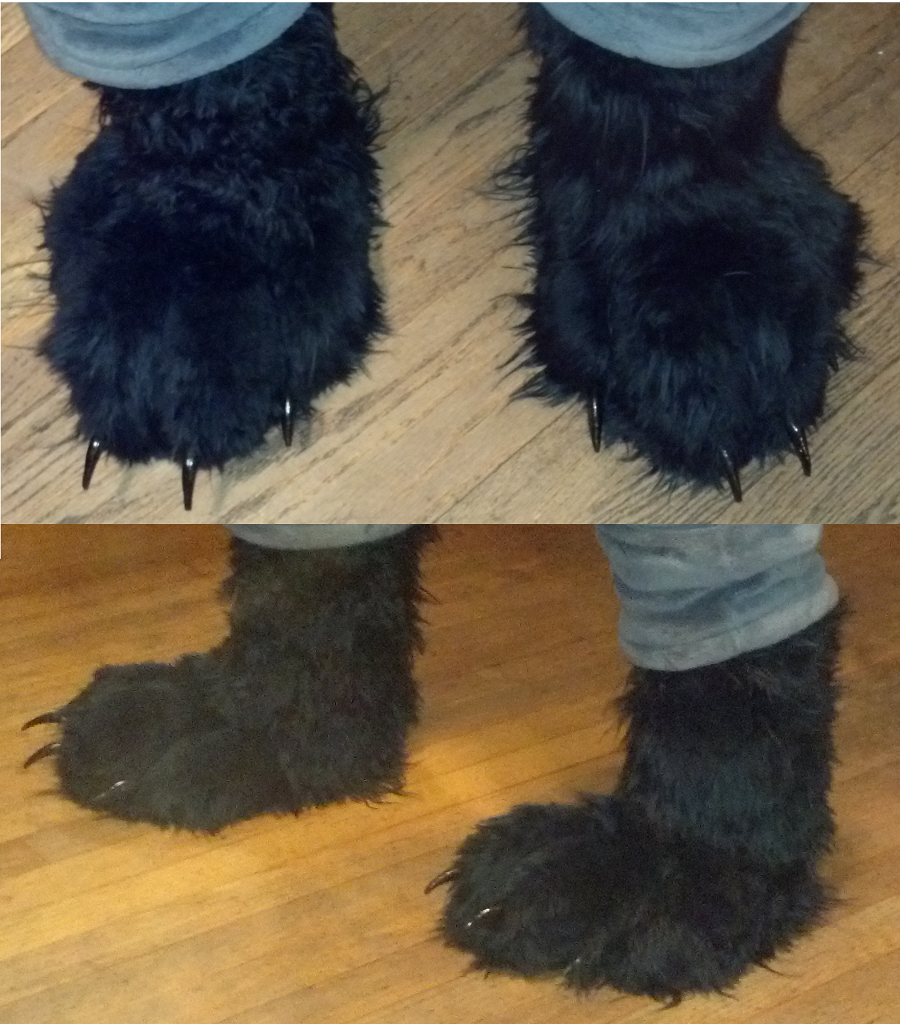
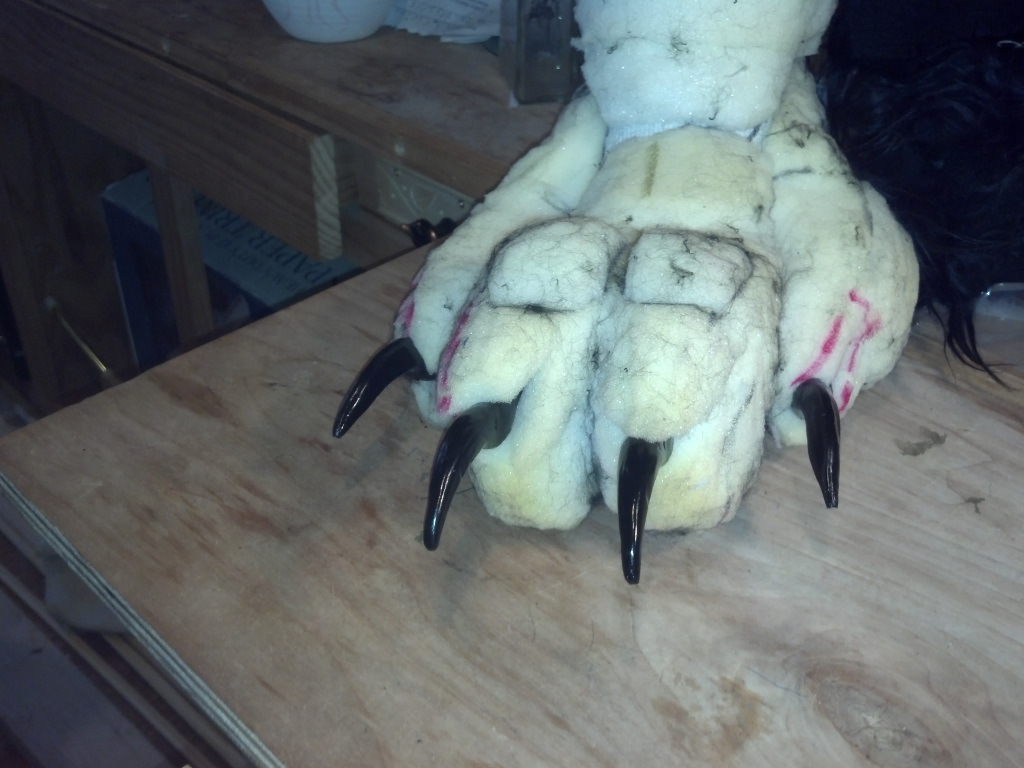
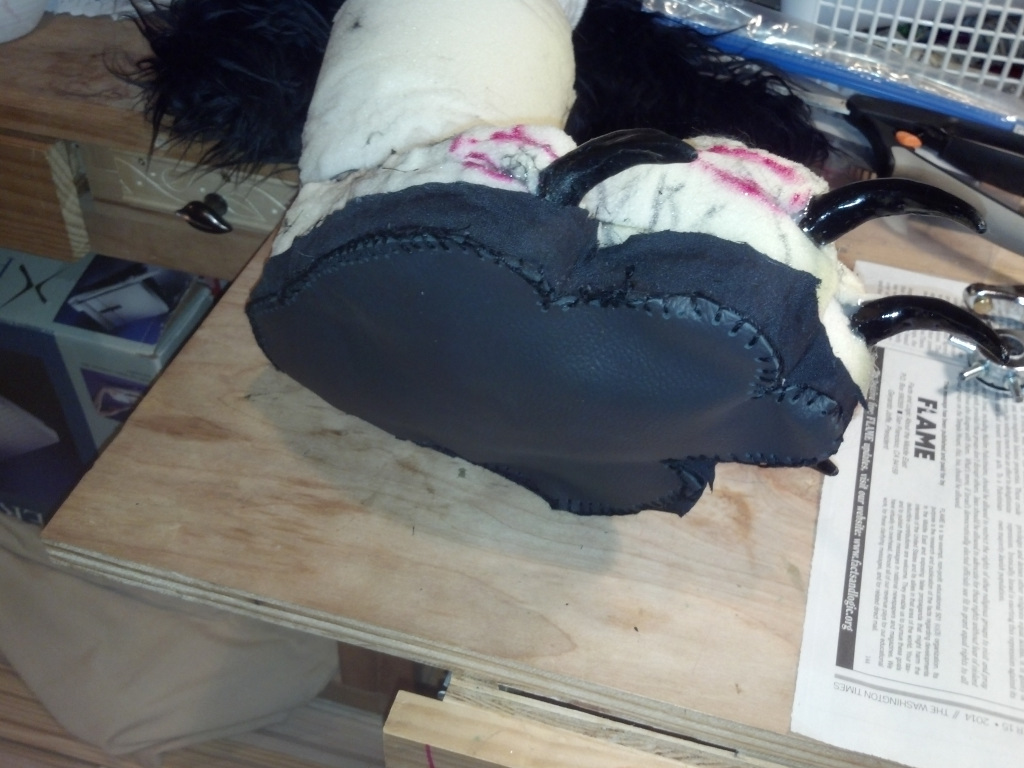
With the tape removed, I could now attach the claws. I cut a slit in each toe and hot-glued the claws into place:
Using the sole pattern I had made from the tape, I cut a piece of leather for the sole as I wanted these to be environmentally resistant enough to wear indoors and out. I glued a strip of fabric around the bottom of each paw and sewed the leather sole to that first:
I used the other tape-patterns to cut pieces of fur. I used black mongolian fake fur I got off Amazon from Fabric Empire.
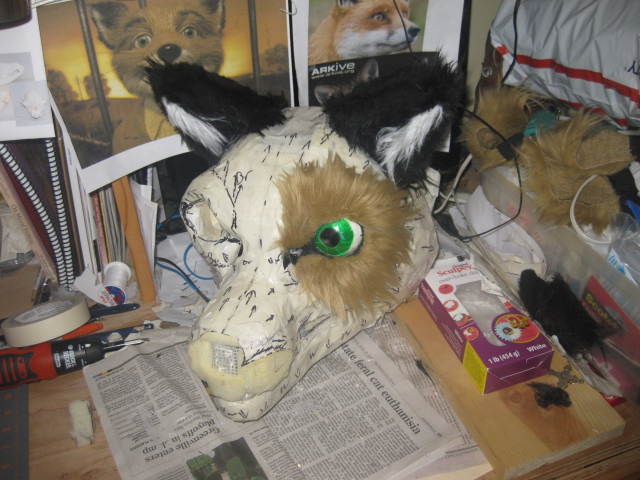
I hand-sew as much of the pieces of fur together that I can before I start attaching it. In this case, I could sew everything together (without the sole) except the seam down the back of the leg and then slip the entire thing on. I marked where the claws would come through and punctured a hole in the fur on each toe and then slipped the whole thing onto the foam paw. I hot-glued the fur around the claws first and along the bottom of each toe. Then I rolled back the fur off the instep and glued the it down. I just took my time and did one lateral stripe of glue across the toes, pressed it down until it started to set, then did another stripe a little further up toward the instep. I pressed down between toes and really made sure that set so that the fur adhered to contours of the toes. Once I got to the back of the leg, I sewed it up and then shot glue into the seam to hold it down as well as to prevent the edge of the fur from unraveling where the threads went through. Unfortunately, I forgot to take pictures while I was doing all the furring. There are plenty of discussions about the process on the internet, but here’s a picture of my fox mask in-progress to give you an idea of how this goes.
That’s how I did it! If you have questions or comments, you can leave them here or email me at graowf@wolf.ishly.me.